はじめに
筆者はAWS認定ソリューションアーキテクト-プロフェッショナル合格に向けて勉強中ですが、座学はあまり性に合わずできるだけ手を動かして勉強したいため、本ブログを通じて AWS の様々なサービスを使ってみようと思っています。本日は S3 で静的Webサイトをホスティングしてみようと思います。
S3 とは
Amazon Simple Storage Service (Amazon S3) は、業界をリードするスケーラビリティ、データ可用性、セキュリティ、およびパフォーマンスを提供するオブジェクトストレージサービスです。(出典:Amazon S3とは)
今回作ってみる Webサイト
以下をサンプルとして使ってみようと思います。
構成
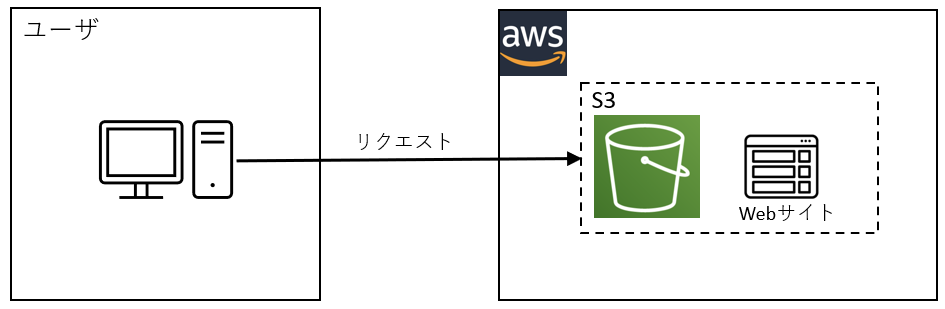
手順
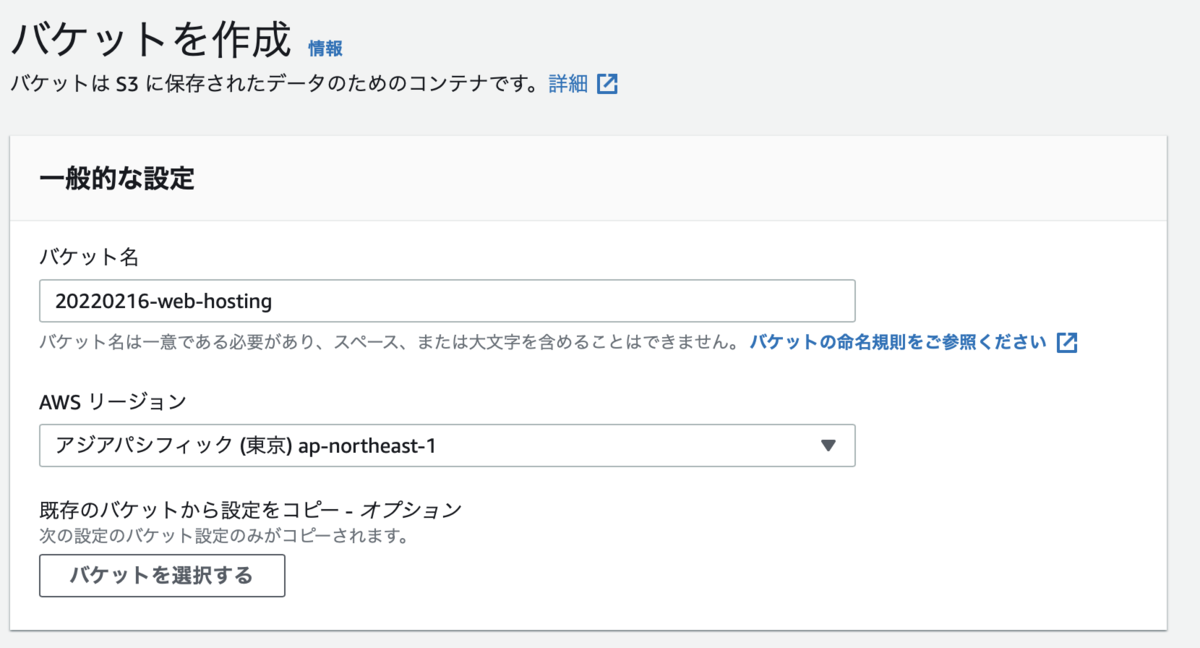
1.S3にバケットを作成
以下のバケットを作成します。
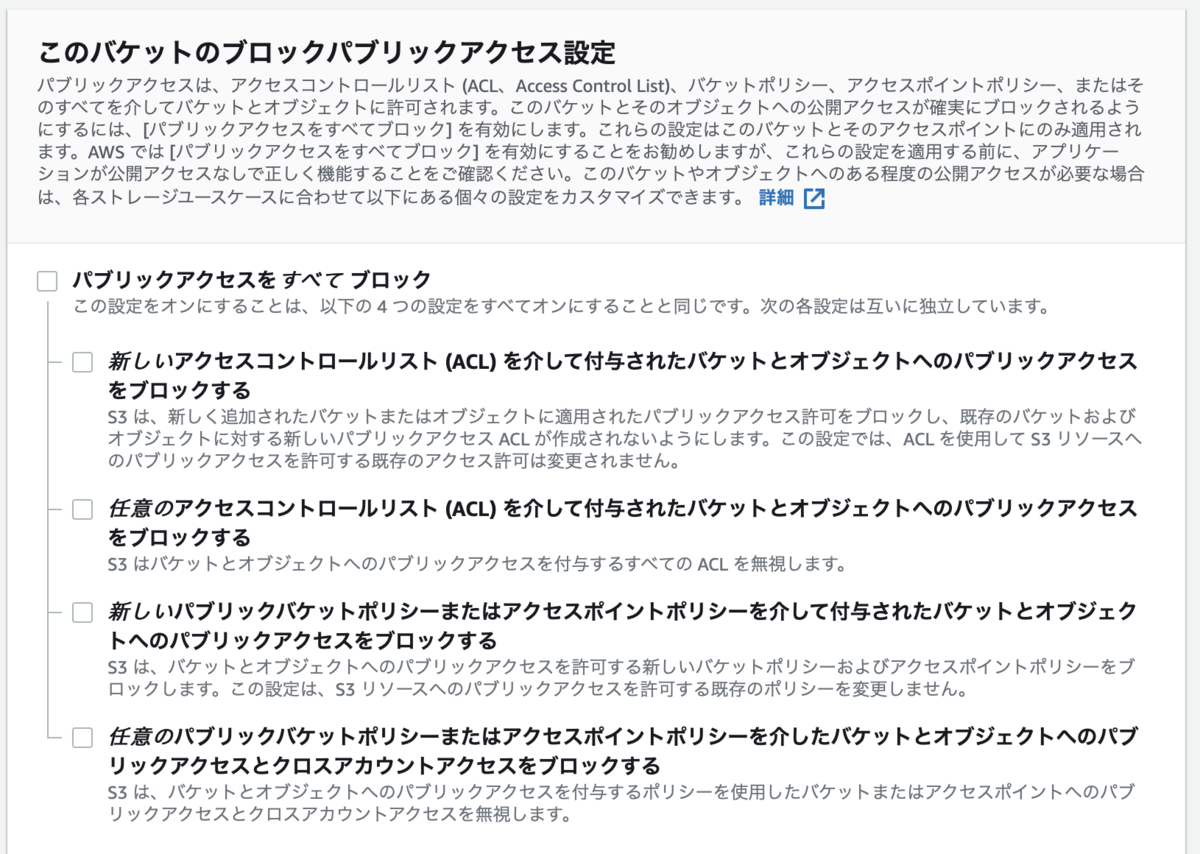
「パブリックアクセスをすべてブロック」のチェックを外してバケットを作成してください。
2.バケットポリシーを編集
バケットポリシーを以下のように編集します。
{
    "Version": "2012-10-17",
    "Statement": [
        {
            "Sid": "PublicReadForGetObjects",
            "Effect": "Allow",
            "Principal": "*",
            "Action": "s3:GetObject",
            "Resource": "arn:aws:s3:::バケット名/*"
        }
    ]
}
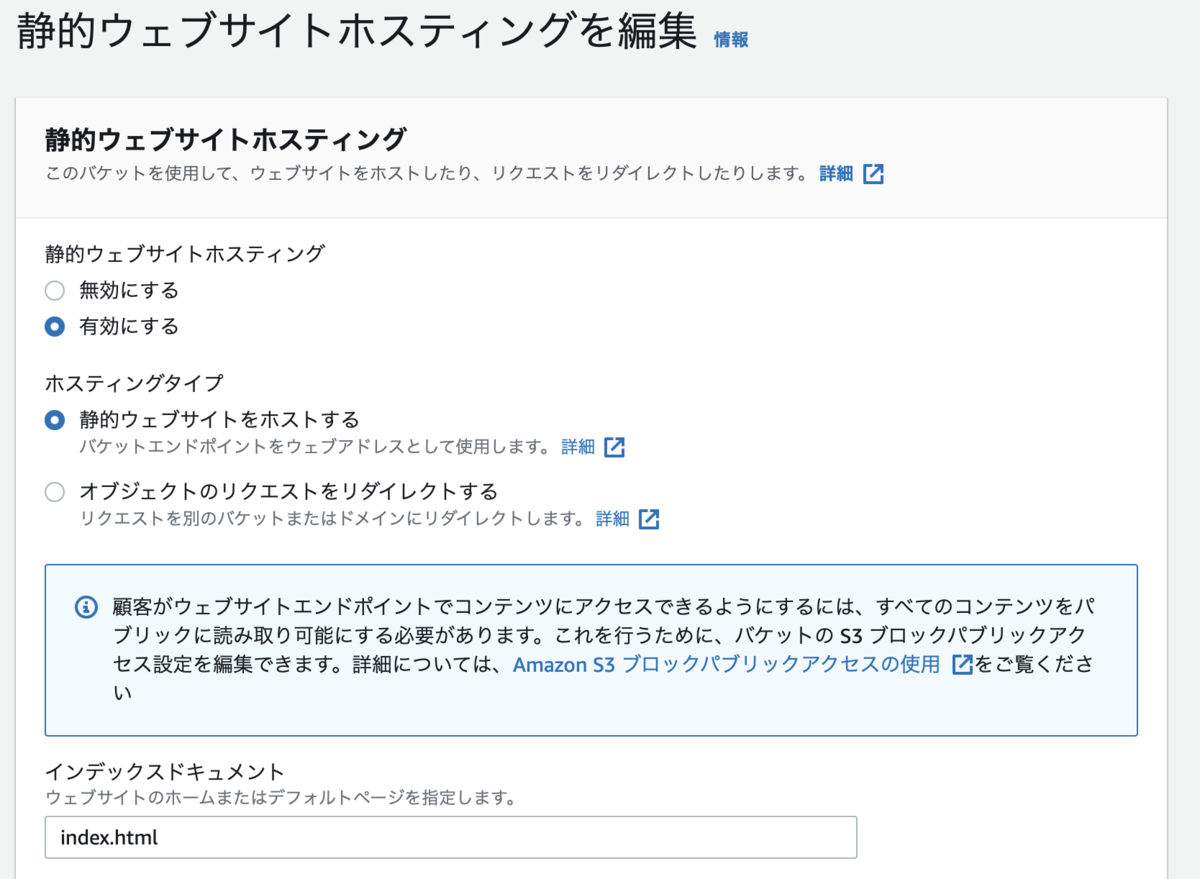
3.静的ウェブサイトホスティングを有効にする
バケットのプロパティから静的ウェブサイトホスティングを有効にします。
4.index.html を作成
以下のように index.html を作成します。
<html>
  <head>
    <meta charset="utf-8" />
    <meta
      name="viewport"
      content="initial-scale=1,maximum-scale=1,user-scalable=no"
    />
    <title>
      Highlight feature with effects and blending | Sample | ArcGIS API for
      JavaScript 4.22
    </title>
    <style>
      html,
      body,
      #viewDiv {
        padding: 0;
        margin: 0;
        height: 100%;
        width: 100%;
      }
      #messageDiv {
        padding-left: 10px;
        padding-right: 10px;
      }
    </style>

    <link
      rel="stylesheet"
      href="https://js.arcgis.com/4.22/esri/themes/light/main.css"
    />
    <script src="https://js.arcgis.com/4.22/"></script>

    <script>
      require([
        "esri/WebMap",
        "esri/views/MapView",
        "esri/layers/VectorTileLayer",
        "esri/Graphic",
        "esri/layers/FeatureLayer",
        "esri/layers/GraphicsLayer",
        "esri/layers/GroupLayer"
      ], (
        WebMap,
        MapView,
        VectorTileLayer,
        Graphic,
        FeatureLayer,
        GraphicsLayer,
        GroupLayer
      ) => {
        const map = new WebMap({
          basemap: {
            portalItem: {
              id: "f35ef07c9ed24020aadd65c8a65d3754" // modern antique vector tiles
            }
          }
        });
        const vtLayer = new VectorTileLayer({
          portalItem: {
            id: "2afe5b807fa74006be6363fd243ffb30" // gray vector tiles canvas
          }
        });
        const countries = new FeatureLayer({
          portalItem: {
            id: "53a1e68de7e4499cad77c80daba46a94" // boundaries of countries
          }
        });
        // This group layer groups the gray canvas vector tiles and
        // countries feature layer.
        // With destination-over blendMode, the background layer covers
        // the top layer. The top layer is put behind the destination layer.
        // So when the app starts, the basemap layer will be shown over this layer
        const groupLayer = new GroupLayer({
          layers: [vtLayer, countries],
          blendMode: "destination-over"
        });
        map.add(groupLayer);
        const view = new MapView({
          container: "viewDiv",
          map: map,
          zoom: 6,
          center: [2, 46],
          constraints: {
            snapToZoom: false,
            minScale: 147914381
          }
        });
        let layerView, animation;
        // countryGraphicsLayer is added to the view's basemap.
        // It will contain black polygon covering the extent of the world
        // the country graphic will also be added to this layer when user clicks a country.
        // With destination-in blend mode, the contents of background layer is
        // kept where it overlaps with top layer. Everything else is made transparent.
        // In this case, the countryGraphicsLayer will be displayed underneath
        // modern antique vector tiles basemap.
        // The bloom effect will add a glow around the selected country.
        const countryGraphicsLayer = new GraphicsLayer({
          blendMode: "destination-in",
          effect: "bloom(200%)"
        });
        map.loadAll().then(async () => {
          addWorld();
          map.basemap.baseLayers.getItemAt(1).blendMode = "multiply";
          // add the buffer graphicslayer to the basemap
          map.basemap.baseLayers.add(countryGraphicsLayer);
          // get a reference ot the countries featurelayer's layerview
          // layerview will be queried to get the intersecting country
          // when user clicks on the map
          layerView = await view.whenLayerView(countries);
        });
        view.ui.add("messageDiv", "top-right");
        const symbol = {
          type: "simple-fill",
          color: "white",
          outline: null
        };
        // listen to the view's click event
        view.on("click", async (event) => {
          // query the countries featurelayer for a country that intersects the point
          // user clicked on
          const {
            features: [feature]
          } = await layerView.queryFeatures({
            geometry: view.toMap(event),
            returnGeometry: true,
            maxAllowableOffset: 10000,
            outFields: ["*"]
          });
          countryGraphicsLayer.graphics.removeAll();
          animation && animation.remove();
          let world = addWorld();
          // add the clicked country feature to the graphicslayer
          if (feature) {
            feature.symbol = symbol;
            countryGraphicsLayer.graphics.add(feature);
            // add a fade animation to show the highlight effect
            // for the selected country
            animation = fadeWorld(world);
            // zoom to the highlighted country
            view.goTo(
              {
                target: view.toMap(event),
                extent: feature.geometry.extent.clone().expand(1.8)
              },
              { duration: 1000 }
            );
          }
        });
        function addWorld(world) {
          world = new Graphic({
            geometry: {
              type: "extent",
              xmin: -180,
              xmax: 180,
              ymin: -90,
              ymax: 90
            },
            symbol: {
              type: "simple-fill",
              color: "rgba(0, 0, 0, 1)",
              outline: null
            }
          });
          countryGraphicsLayer.graphics.add(world);
          return world;
        }
        // add a fading animation when user clicks on a country
        function fadeWorld(world) {
          let timer;
          // requestAnimationFrame method specifies "frame" function
          // to perform an animation where the opacity of the world polygon graphic
          // decreased by 0.1 until it is 0 or completely transparent
          // then the animation is cancelled
          function frame() {
            const symbol = world.symbol.clone();
            symbol.color.a = Math.max(0, symbol.color.a - 0.1);
            world.symbol = symbol;
            if (symbol.color.a > 0) {
              timer = requestAnimationFrame(frame);
            }
          }
          frame();
          return {
            remove() {
              cancelAnimationFrame(timer);
            }
          };
        }
      });
    </script>
  </head>
  <body>
    <div id="viewDiv"></div>
    <div id="messageDiv" class="esri-widget esri-heading">
      <h4 class="esri-heading">Click on a country</h4>
    </div>
  </body>
</html>
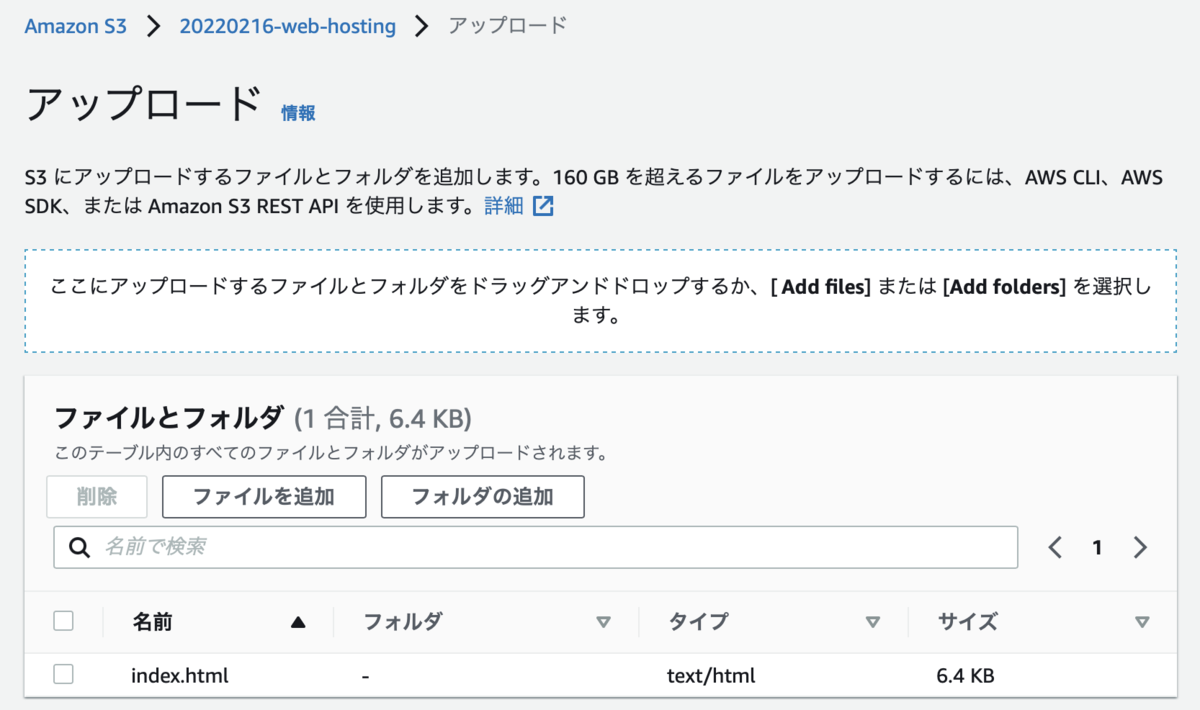
5.index.html をバケットにアップロード
index.html をバケットにアップロードします。
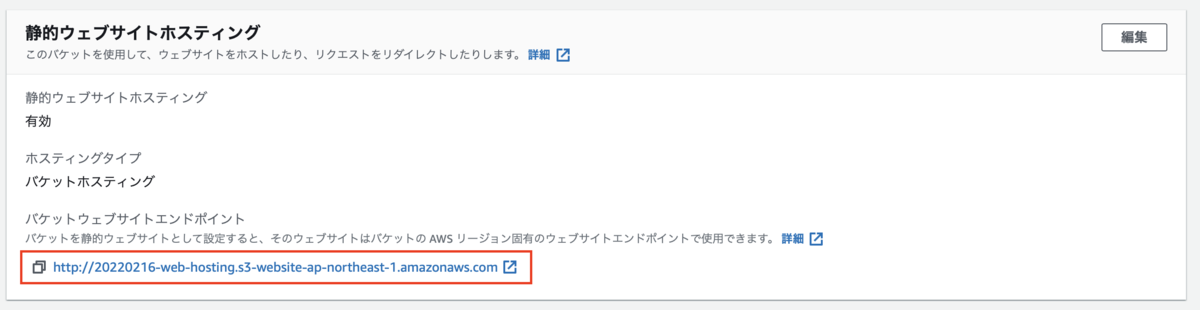
バケットのプロパティに Web サイトの URL があるのでこれを使って Web サイトにアクセスしてください。
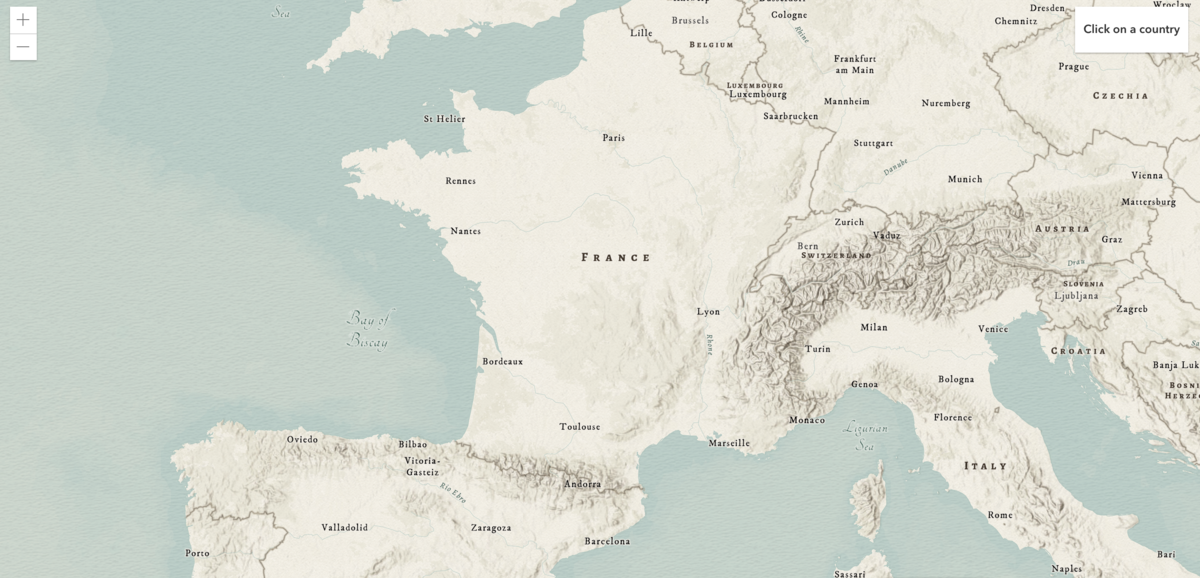
6.動作確認
Web サイトにアクセスできることを確認しました。
さいごに
AWS認定試験でも頻繁に出題される S3 の Webサイトホスティングですが、ちょっとしたWebサイトを公開するのには非常に便利な機能ですね。今後はただ Web サイトを公開するだけではなくCloudFront などを使ってみようと思います。